
This update has a few little details. They seem small, but they were time consuming.
First off is weld beads made from epoxy putty. (green stuff) I think this is one of those simple additions that adds a lot of character to a tank model. Only the front is pictured here, but it goes all the way around most of the hull panels. I didn't do everything in the spirit of 'not taking it too far' but I think i'm getting all the major parts.

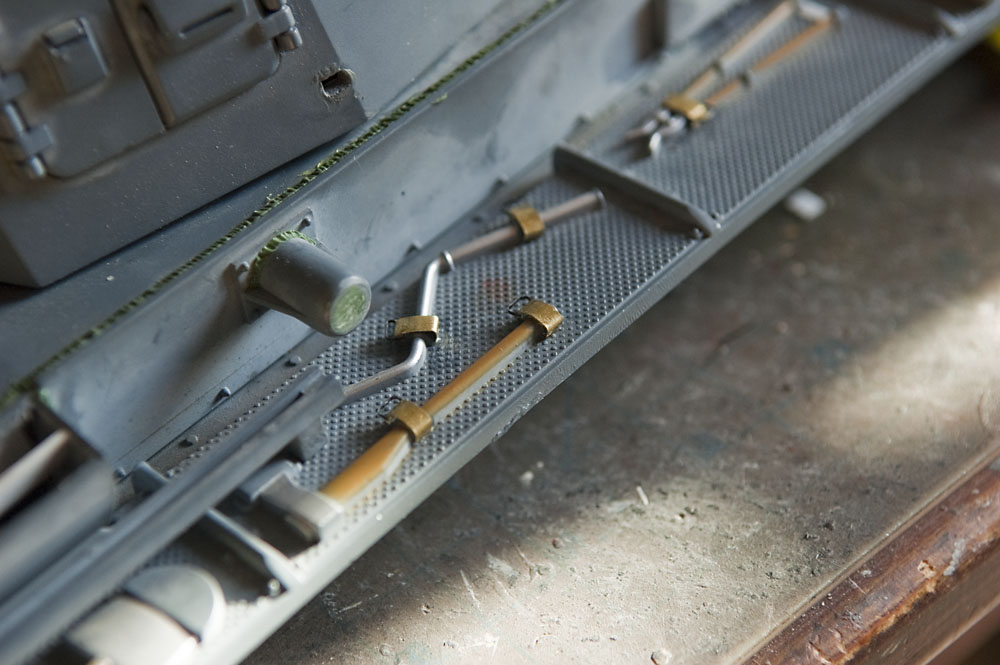
You can see a few more welds on the rear deck here, but what is most obvious is the clamps and rear rack. I was originally just going to use the kit tow cables, but started thinking how much cooler an Afrika Korps tank would look with a rack full of jerry cans, so bought some resin jerry cans and I made a rack out of styrene loosely based on some reference photos. Now since there's a rack with supplies, which will probably include a tarp on at least part of the rear deck, I decided to relocate the tow cables. I've got some framing wire that'll make that handy, although i'm going to have to create the eyelet parts somehow. I don't want to spend any more money to buy pre-built cables... it's been an expensive month already with my Hooben T55 purchase, brakes for my truck, parking ticket, partying all night last weekend.. ugh..

As I mentioned above, i'm relocating the tow cables, so now that means the rear deck is empty. There should be clamps and hooks for the cables. So I made some out of styrene and some brass that was leftovers from old photoetch parts.
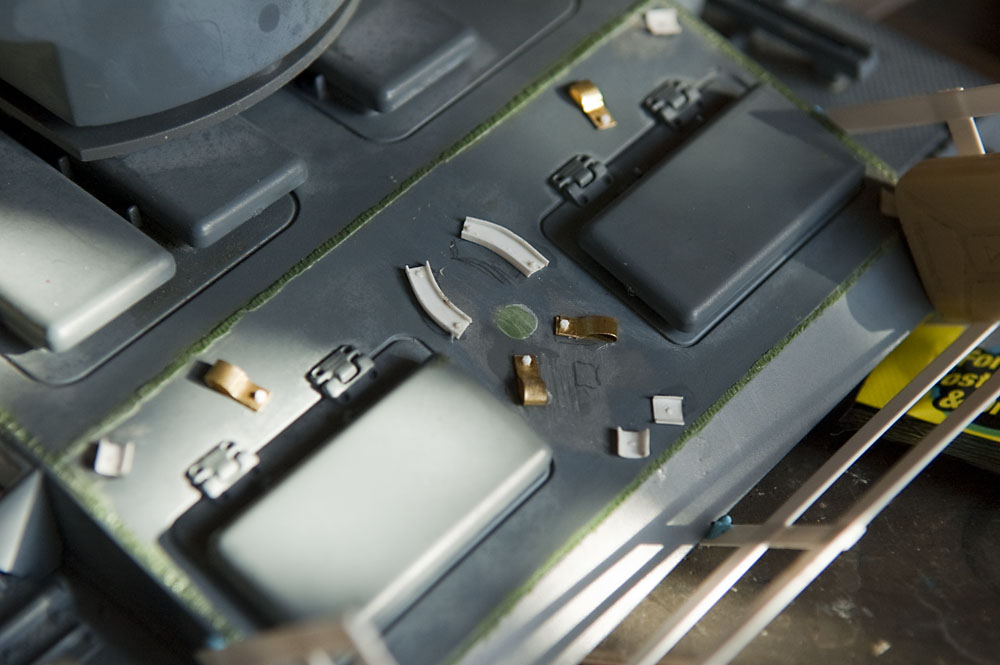
Last, but not least for this update is tool clamps. I have some Aber PE tool clamps, but they're so complicated, I just didn't want to use them for this build.. so I made some fake non-working ones. I think they look ok.
1 comment:
I'd like to say thanks a lot for doing this blog.
I've just started doing an upgrade for the first time on my Panzer iii, and am slowly muddling through, but your pics are an inspiration for what can be achieved on a budget. I think what you've done is incredible.
I wondered if I could ask you a question? I had just bought some Milliput to try and simulate the welds, but having given this a trial run, I've found it's not so easy to get a subtle look; how have you managed to get such a realistic effect, without the clumsy result that most people end up with?
Post a Comment